When it comes to cleaning solder from copper pipes, it can be a difficult and time-consuming process. However, it is important to remove all solder from the pipe before starting any plumbing repairs. Otherwise, the new solder will not adhere properly and could cause leaks. The purpose of this article is to provide a few simple instructions on how to remove solder from copper pipes.
Why Should I Remove Solder from Copper Pipes?
Solder should be removed from copper pipes for two reasons. First, if there is any existing damage to the pipe, it is important to remove all of the old solder before applying new solder. This will ensure that the new solder adheres properly and does not leak. Second, even if there is no damage to the pipe, removing the old solder will make it easier to apply new solder.When you want to discover further more information about plumbing, you've to browse around https://plumbingtechie.com website.
How to Clean Solder From Copper Pipes
Here's what you'll need to clean solder from copper pipes:
- A soldering torch
- A putty knife
- A wire brush
- Sandpaper
- Vinegar
- Rubbing alcohol
- A clean rag
To remove solder from copper pipes, here are 5 steps:
Step 1: Cut the Pipe
First, you will need to cut the pipe at the point where you want to remove the solder. You can use a hacksaw, a tubing cutter, or a rotary tool with a cutting disc. It is also a good idea to protect your eyes when working with power tools by wearing safety goggles.
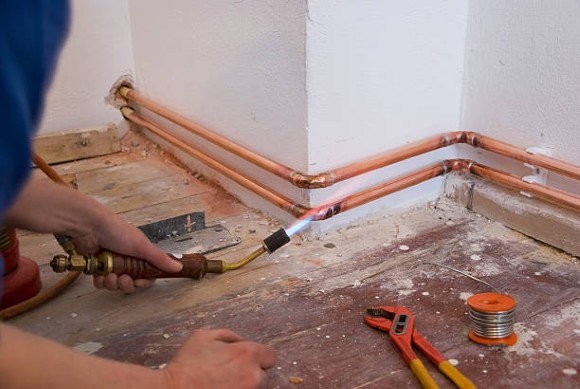
Step 2: Heat the Pipe
Next, use your soldering torch to heat the pipe at the cut you made in step one. Keeps the flame moving so that you evenly heat the entire circumference of the pipe. You will know the pipe is hot enough when the solder starts to melt and run.
Step 3: Remove the Solder
Once the solder has melted, use your putty knife to scrape it away. Start at the top of the pipe and work your way down. Be sure to hold the pipe with a cloth or gloves so you don’t burn yourself. Make sure you have a bowl of water nearby in case the solder drips.
Step 4: Clean the Pipe
Once all of the solder has been removed, use your wire brush to clean the inside of the pipe. This will remove any residue that is left behind. Next, use sandpaper to smooth out the inside of the pipe.
Step 5: Disinfect the Pipe
Finally, it is important to disinfect the pipe before using it again. This will help to prevent any bacteria or mold from growing inside the pipe. To do this, mix equal parts vinegar and water, or rubbing alcohol and water. Then, use a clean rag to wipe down the inside of the pipe.
Conclusion
Soldering is an important part of many DIY and home improvement projects, but it can be tricky to get the solder off the copper pipe when you’re finished. These five simple steps will help clean the solder from the pipe quickly and easily, so you can move on to your next project. Have you tried these tips for cleaning solder from copper pipe? What tricks do you use to make this process easier? Share your tips in the comments below.
Комментариев нет:
Отправить комментарий